How do you tackle project proposals? Photos? Mockups? Sketches? All of the above?
There are definitely a few ways to tackle a design proposal. It can certainly depend on the project type and who the client is, but we are of the mindset that visual is best. Typically, we’ll include a mixture of visuals: sketches, mockups, and renderings – and usually in that order!
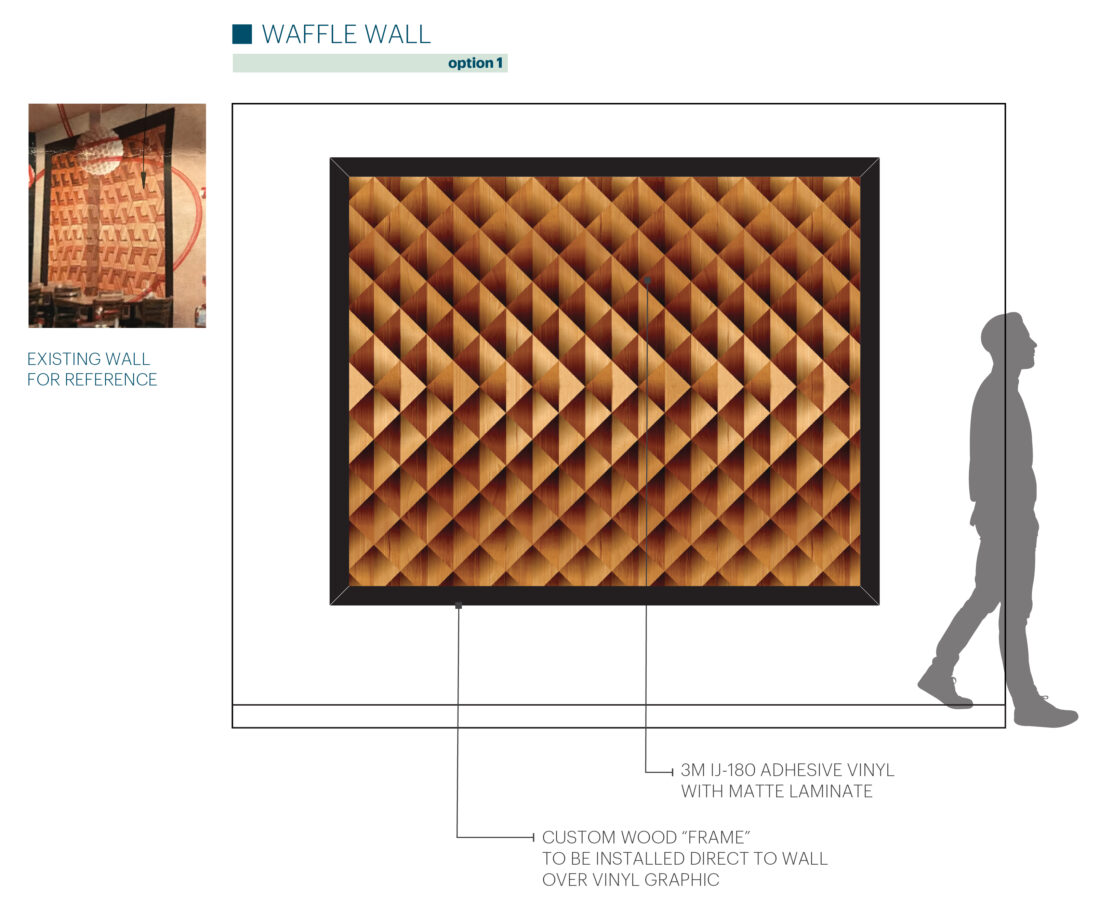
Let’s take a wall graphic for example. Our favorite place to start is a sketch. Pen to paper.
Typically, we’ll print out a quick pic of the area, grab our tracing paper, our pen, and get to work. Then, we show you! We’re a huge fan of this method (if you couldn’t already tell).
Then, we’ll get to rendering – using some rough digital techniques to showcase the proposed graphic in a middle stage – not fully realized, but leveled up from a sketch. This can help the client really visualize what the final product will look like, especially when we add in measurements, figures for scale reference, and any other wall identifiers. In some cases, we’ll even overlay the graphic over a picture of the blank wall to leave no room for the imagination. In other words, we render it right.
And down the line when you’ve brought your sketch to reality, that rendering helps all others involved in the project, from printer to installer!